Happy New Year! Our last of three kitchens we gave a white makeover to features the Miller family of Charleston.
Pam and Wayne are the owners of a two-story home with a basement in South Hills. They, like many of our clients, were in desperate need of a full kitchen/first-floor remodel.
Although their existing cabinets were white, they had been painted in previous years and were not the perfect storage solution for their current needs. The two walls that separated the kitchen and dining areas were not only view-obstructing, but they also were underutilized in their potential for use.
Upon our first meeting with Pam and Wayne in their home, our consult began by identifying their storage needs, their wishes for an open space plan and their overall design scheme.
From that meeting, we developed a list of must-haves:
Matching and updated appliances.
Solid-surface countertops.
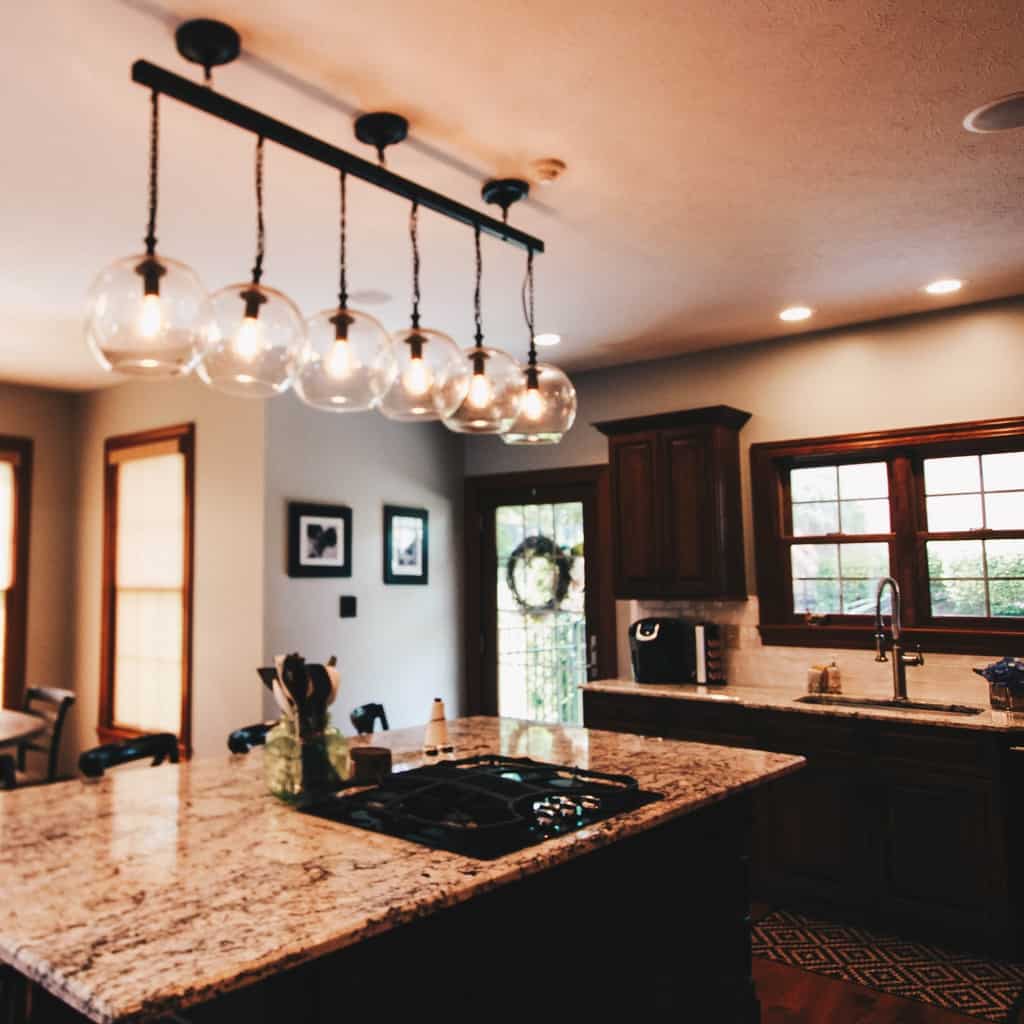
An L-shaped island.
Unified wood flooring.
Tile backsplash.
Contemporary color scheme.
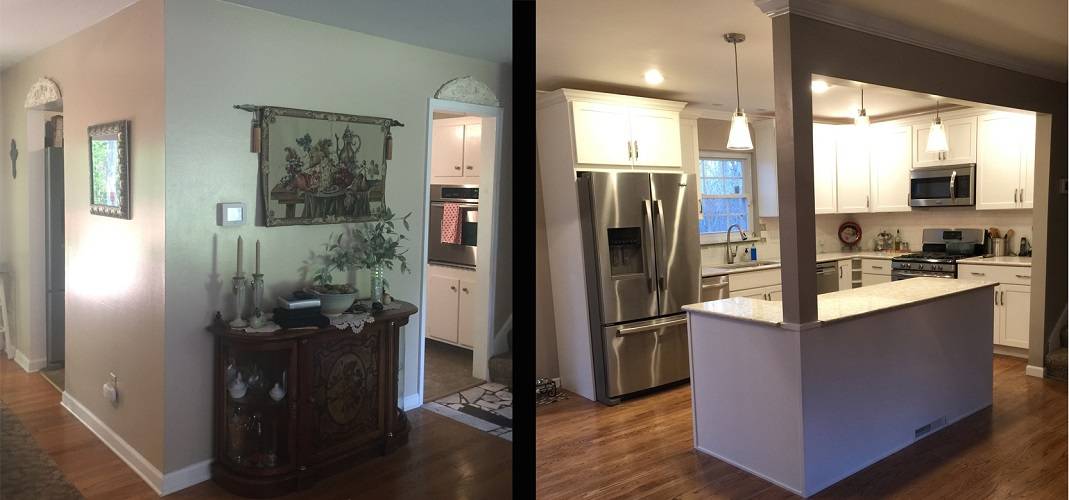
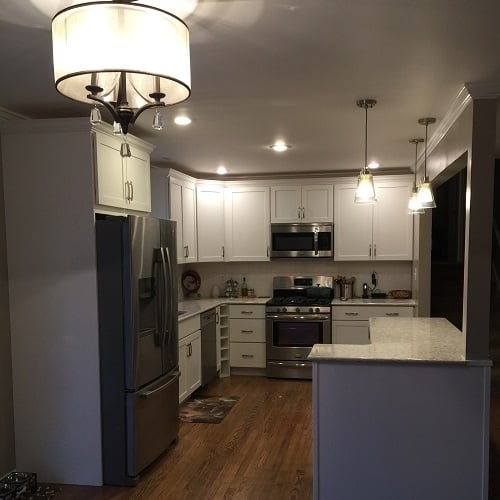
Even though the Millers started out with a white kitchen, we were able to give them a more efficient cabinetry plan, open a few dividing walls and add a contemporary color scheme – which means more storage, more work surface and a more updated look
In the Miller’s design plan, we only altered the layout of the appliances and cabinets sparingly.
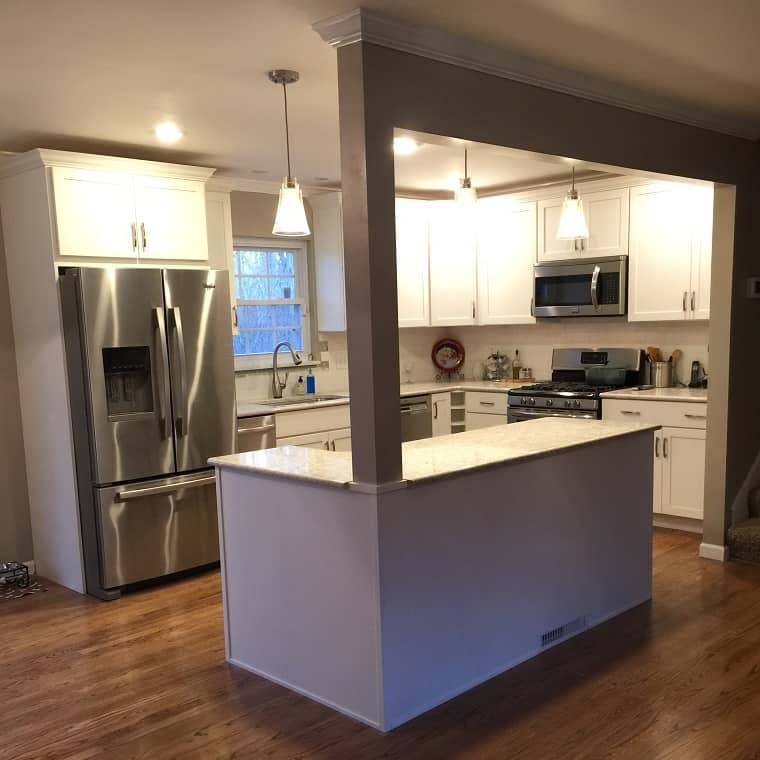
The refrigerator was moved slightly to the left only after eliminating the wall separation from the dining room. This gave us room to encase the refrigerator with panels, eliminating the ugly sides of an unfinished appliance.
We also added a cabinet that was a full 24-inches in depth directly above the refrigerator for extra storage. Immediately next to the refrigerator, we added a compactor to replace the small waste can that used to occupy the wall separating the kitchen and living room.
The aforementioned wall also used to house a microwave cart. The addition of a microwave hood over the top of a new range replaced an outdated over-the-range hood and cooktop as well as a wall oven. These small changes made all the difference for countertop and cabinet storage in the new plan.
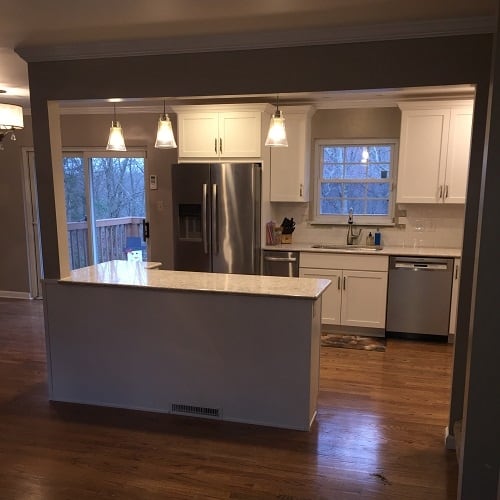
With three different flooring materials in the main living space at the beginning of the project, the new hardwood throughout the now open-concept living room, dining room, and kitchen really unifies the entire space
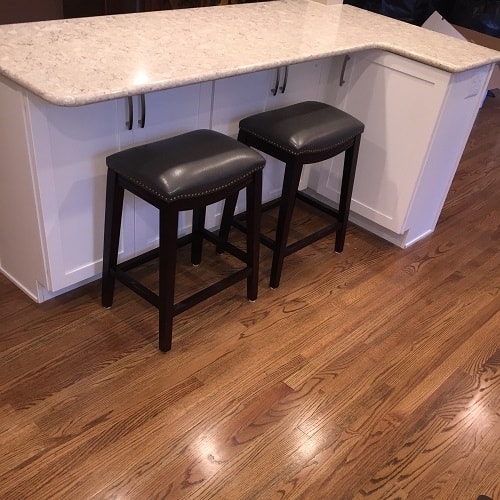
To replace the Formica countertops, we chose a beautiful LG quartz selection in the color Aria. Aria is similar to marble countertops but with even better durability; it won’t stain or chip as easily as the soft components of marble countertops.
An added bonus to the selection was the ability to do an undermount sink instead of the original drop-in sink, which can be cumbersome to clean around.
After the appliance and island design was complete, the added countertop square footage was doubled and gave the Millers so much more room for countertop appliances and cooking space.
They were adamant their island be L-shaped. This was the perfect solution because the wall that separated the kitchen and living room needed a header and support column to accommodate the new open plan design. To save room and not intrude into the living area, we chose custom-depth cabinets that were very unique in design.
Normally, our clients choose to do their overhang on the outside of their island plan for seating purposes. The Millers specifically asked that the overhang be placed toward the kitchen side of the room. This would help them sit on the front side of the island instead of the back for television viewing as well as conversational ease with guests in their living area.
The cabinets would then have to be full height with no drawers to make this a successful design due to a 12-inch overhang above them that allowed the Millers to store canned goods and small appliances in the island. To integrate the support column, we built it into the corner of the cabinets, paneled around it and had it cut into the countertop custom design.
We also accommodated a floor vent into the island and easily rotated it into a back panel that still let it be efficient for the new design. Three pendant lights were then placed into the ceiling to give efficient amounts of light for tasks.
When initially meeting with the Millers, we noticed they had three different flooring types in the first-floor area. To unify the space, we brought the flooring to one finish.
Pam Miller really wanted a place where she could work but still be able to visit with her son and husband in the evenings. Now, she has a great space to work in and serve from whether in the kitchen, living, or dining room.
Paul, with Walk the Plank, was the perfect solution to our problem. Along with Tony Harrah, our stellar contractor, he removed the existing stone walkway from the front door to the kitchen and the vinyl flooring in the kitchen area, and he feathered in unfinished wood planks.
He then sanded and stained the wood in a custom finish the Millers chose to look like one continuous new wood floor. This let the new design feel complete and unified.
Initially, the Millers did not have a tile backsplash between their countertop and cabinets. We chose a clean and sleek white subway tile that would create ease of cleaning and also made the space brighter with their newly selected white cabinets and countertops and updated gray wall color scheme.
The Millers’ new kitchen design made vast improvements to their first floor. Not only could they store all of their kitchen small appliances, pots and pans, and pantry items, we even made a space for their dog’s water and food bowls.
Originally, those things had been placed next to the microwave cart on an unused wall. They now found their home to the left of the refrigerator and out of the way of every day traffic.
What once was a cramped and inefficient kitchen is now a haven for storage and easily allows conversation to flow from room to room in the open living plan on the Miller’s main level of their home
Additionally, the new cabinet design featured taller cabinets that came within inches of the ceiling, allowing for more storage and a cleaner design.
None of this would be possible, of course, without a talented and capable contractor. As always, we used Tony and his team to make this transition possible. Thanks to his ability to make the impossible possible, the Millers ended up using Tony to replace their front and back doors and other small jobs throughout the house.
This concludes our three-part series of white kitchen upgrades. While we know not everyone dreams of a white kitchen, we at Yeager Design and Interiors hope to be able to help you achieve any kitchen dream you may have.
We wish you blessings and good tidings for 2017, and if you find yourself in need of design help in your home, our team is ready and willing to tackle any need you may have.
– To see more pictures of the projects featured in this article:Miller Home
– To read the full article: http://www.wvgazettemail.com/life-home